I once heard a joke that went something like this: At the sunday church service,…
My pcslPunk (TM!) Chronograph (not a bomb!)

Whilst online helping someone code an Arduino to act as a stopwatch, I thought “this would actually make a cool little showcase project”. I wasn’t quite sure what to call the “style”; I had “steamPunk” in mind … but that already means something else. I thought of “cyberPunk” and “retroPunk” too (I especially liked the latter), but alas, they too had already been taken. Darn it! I wanted something “sexy” and “unique” – so I settled on “pcslPunk”; not so “sexy”, but at least it’s unique. A lot like me come to think of it!
The project started when I took a look through their C++ code; it was somewhat disorganised and messy and wasn’t working properly. I started working through it line by line – popping in comments as I figured out “what did what” – cleaning up “no nos” and inconsistencies as I went. And as is so often the case, eventually little “how they’re trying to do something” starts to make sense — at which point it becomes easier to insert alternative code that’s more efficient.
This process continued until I was ready to do some basic testing on a breadboard:
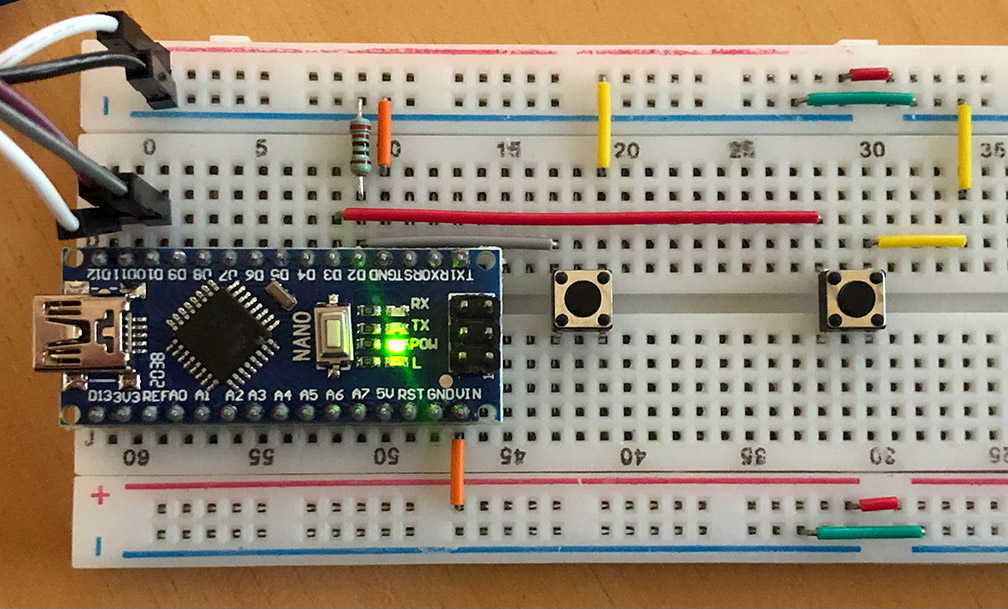
So far so good; I was able to get the code handling the buttons correctly and basically doing everything it should do … but I didn’t have a display that I could test it on (I’d left the portion of their code that handles the display untouched at that point because I was under the impression that that was working OK — turns out it had quite a few issues too). Only one thing to do … order in a suitable display. That’s one of the great thing about these Arduino projects; all the components are just so “darn” cheap.
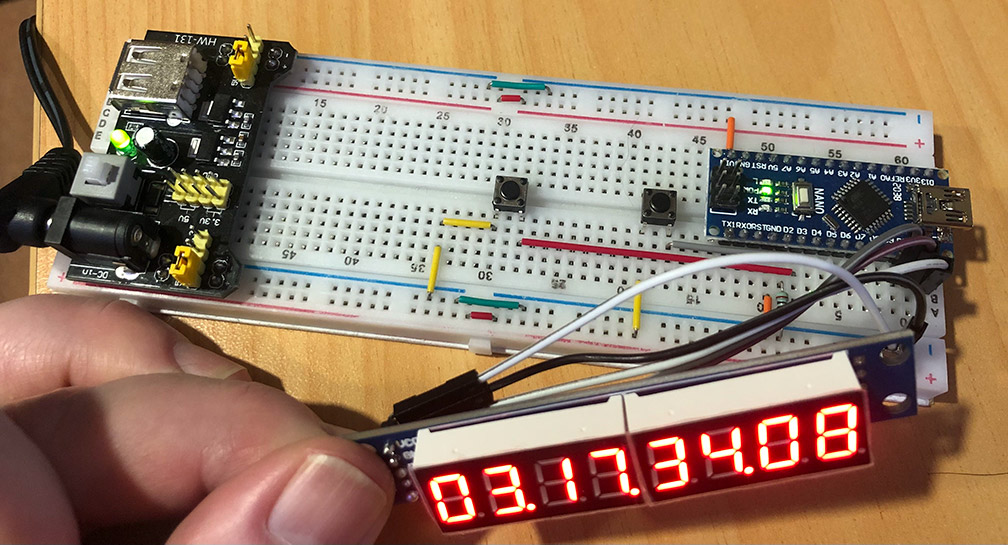
With the display in hand I was able to quickly test and debug the remaining portion of the code. At this point I thought “this is actually kinda cool (in a retro kind of way) – I think I might pop all this into a case and keep it for myself”.
And thus I’ve ended up wit this:
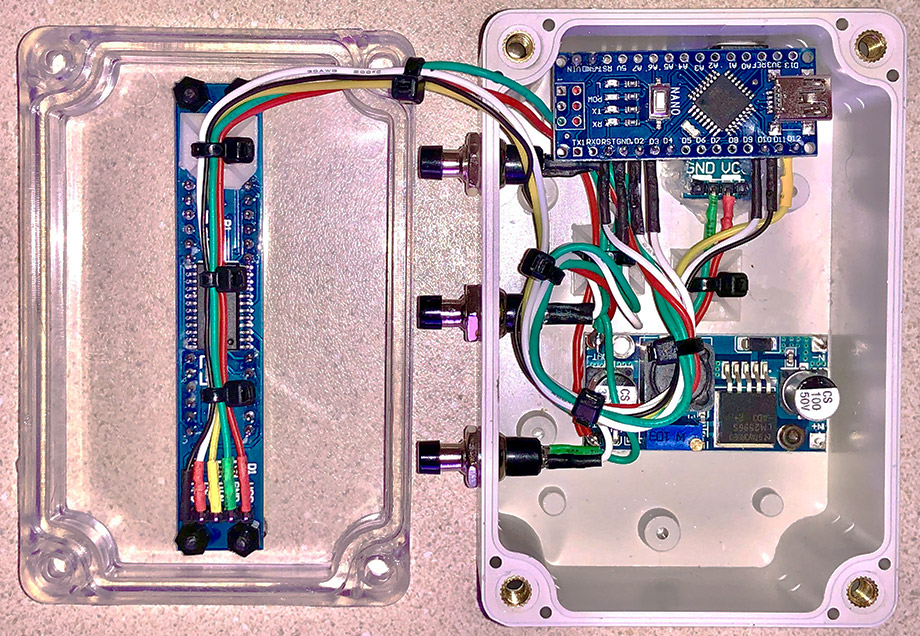
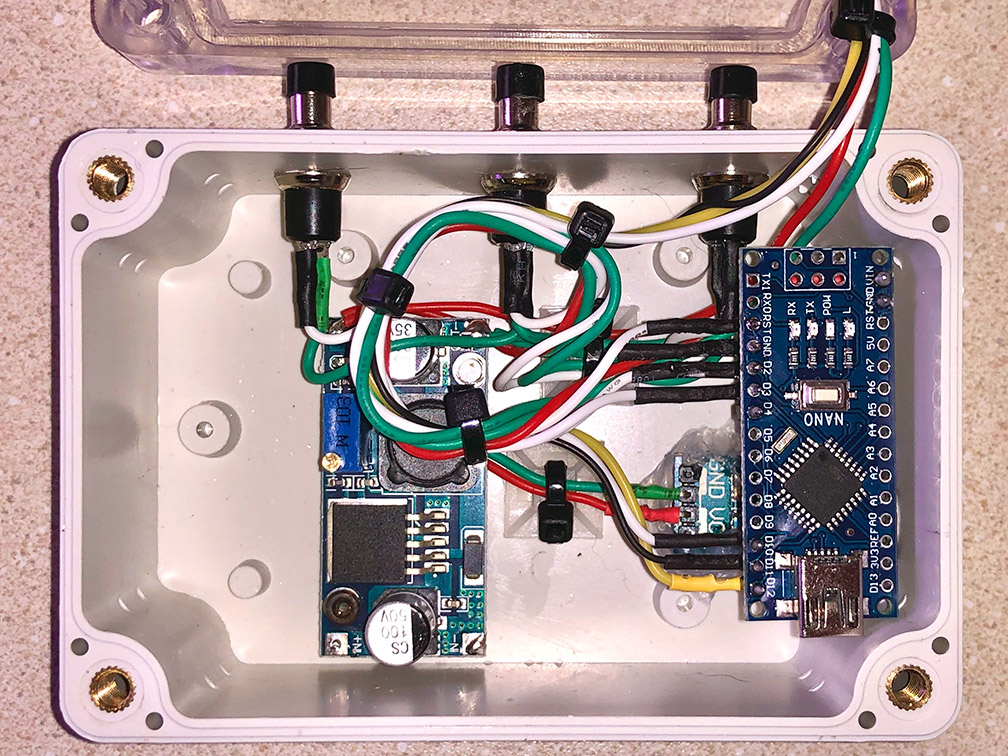
When all complete and “up & running” it looks like this:
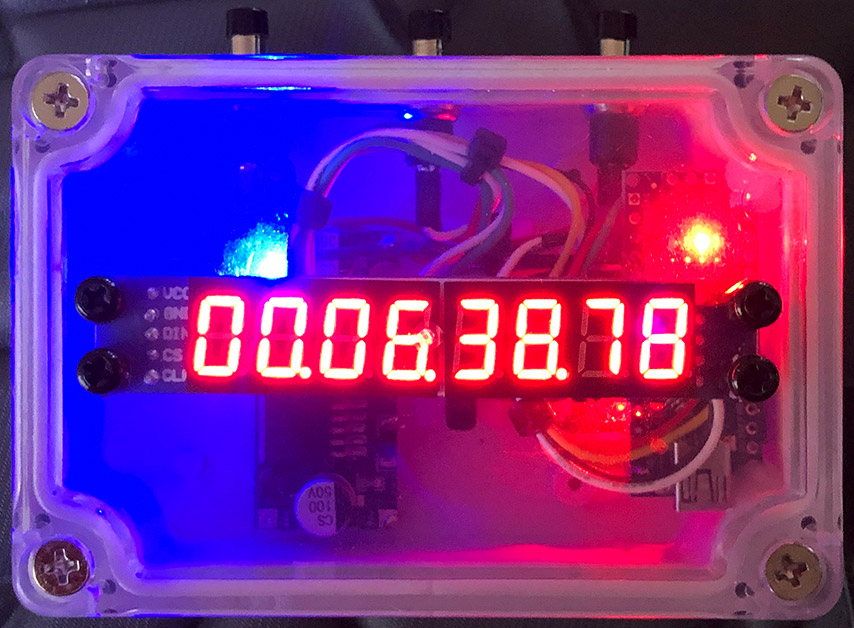
The 9v jack board, power supply, and processor (an Arduino Nano clone) all come with their own (very bright) LEDs which give the case almost a “police red & blue emergency” vibe. Not sure what I’ll use it for – but it’s been a fun weekend project and, as always, it’s impossible not to learn some things along the way.
If anyone is interested in creating their own Arduino projects then I whole-heartedly encourage them to dive in “boots and all”; it’s extremely low-cost to get into (all the software is free) – heaps of fun – and what can be done is limited only by someone’s imagination. Literally. If there’s one single defining thing about Arduino projects, it’s that “most things are far far far far easier to do than people think they’re going to be”. There’s a number of reasons for that:
1. There are a gob-smacking number of sensors available for them (many are available through NZ stores like www.jaycar.co.nz or you can find them on TradeMe) – and most are dirt cheap (many under $4). Sensors to detect things like sound, light, vibration, smoke, fire, tilt, distance, time. Components to play sounds, music, radio, displays. Just Google “Arduino Sensor list” and you’ll start to get the idea. There are literally thousands of them. “That’s fine” I hear you say … “but surely they must be hard to connect?” Nope – most just use one of the standard serial interfaces on every Arduino – so you literally just have to connect about 3 wires in most cases.
2. It’s actually pretty easy to program them. I could never understand how to program in languages like C++ – but Arduino is really easy. And then I discovered that the Arduino programming language IS actually just C++ (more or less). So I guess the moral of the story is “It’s amazing what you can do when you don’t know what you can’t do”. Sure – there are good techniques and bad techniques … and easy vs hard ways of doing things … but the good news is there is a HUGE international community available online ready & able to help. On a serious note I do feel compelled to mention that although there are many on the forums for whom the well of knowledge runs very deep – there are also many who offer-up information that’s wrong – to which others will invariably “call them out on”; so – as with any information sources – you have to decide which ones are credible and which aren’t. There are usually quite a mix of personality types present as well; resulting in an eclectic mix of people.
I’ll conclude by saying that if anyone would like me to develop something for them – or just point them in the right direction – then please don’t hesitate to get in touch. I’ll also post the actual code for the pcslPunk Chronometer below for anyone who’s interested. Happy to explain how any of the code sections work if anyone is curious; I think it’s a good example of using interrupts, time manipulation, and display control.
Cheers!
include "LedControl.h"                                                                      // LED control library
LedControl lc = LedControl(12, 11, 10, 1);                                                  // Define the LED control interface

const byte startButton = 2, stopButton = 3;                                                 // Setup button to pin assignments

int fracSec_t=0, seconds_t=0, minutes_t=0, hours_t=0;                                       // Define time variables

int fracSecLow=0, fracSecHigh=0, secondsLow=0, secondsHigh=0,                               // Define LED digit variables
    minutesLow=0, minutesHigh=0, hoursLow=0, hoursHigh=0;

bool runOnce = false; volatile bool running_t = false;                                      // Setup flags

unsigned long startTime_t, duration_t;                                                      // Define start & duration variables

void setup()
{
  pinMode(startButton, INPUT_PULLUP);                                                       // Setup the pins
  pinMode(stopButton, INPUT_PULLUP);

  attachInterrupt(digitalPinToInterrupt(startButton), startButtonPressedISR, LOW);          // Setup interrupts
  attachInterrupt(digitalPinToInterrupt(stopButton), stopButtonPressedISR, LOW);

  lc.shutdown(0, false);                                                                    // Wakeup the LED controller
  lc.setIntensity(0, 1);                                                                    // Set brightness (0~15)
  lc.clearDisplay(0);                                                                       // Clear screen

  displayData();                                                                            // Execute display data subroutine
}

void loop()
{
  while(running_t)                                                                          // Do while running flag is true
  {
    while(!runOnce)                                                                         // Do while run once flag isn't set
    {
      startTime_t = millis();                                                               // Grab the start time
      runOnce = true;                                                                       // Set the run once flag
    }
    duration_t = millis() - startTime_t;                                                    // how long have we been running?

    if(duration_t >= 360000000)                                                             // Over 100 hours? Wrap to zero
    {
      startTime_t = startTime_t + 360000000;                                                // Move start time by 100 hours
      duration_t = millis() - startTime_t;                                                  // Recalculate duration
    }

    for(hours_t=0; duration_t >= 3600000; duration_t = duration_t - 3600000) {hours_t++;}  // Break into component parts
    for(minutes_t = 0; duration_t >= 60000; duration_t = duration_t - 60000) {minutes_t++;}
    for(seconds_t = 0; duration_t >= 1000; duration_t = duration_t - 1000) {seconds_t++;}
    for(fracSec_t = 0; duration_t >= 10; duration_t = duration_t - 10) {fracSec_t++;}

    fracSecLow  = fracSec_t % 10;                                                           // Calculate each digit
    fracSecHigh = (fracSec_t / 10) % 10;
    secondsLow  = seconds_t % 10;
    secondsHigh = (seconds_t / 10) % 6;
    minutesLow  = minutes_t % 10;
    minutesHigh = (minutes_t / 10) % 6;
    hoursLow    = hours_t % 10;
    hoursHigh   = (hours_t / 10) % 10;

    displayData();                                                                          // Display the data
    }
}

void startButtonPressedISR()                                                                // Start button interrupt handler
{
running_t = true;                                                                          // Set the running flag to true
}

void stopButtonPressedISR()                                                                 // Stop button interrupt handler
{
running_t = false;                                                                         // Set the running flag to false
}

void displayData()                                                                          // Display data
{
lc.setDigit(0,0,(byte)fracSecLow,  false);                                                 // Write digits
lc.setDigit(0,1,(byte)fracSecHigh, false);
lc.setDigit(0,2,(byte)secondsLow,  true);
lc.setDigit(0,3,(byte)secondsHigh, false);
lc.setDigit(0,4,(byte)minutesLow,  true);
lc.setDigit(0,5,(byte)minutesHigh, false);
lc.setDigit(0,6,(byte)hoursLow,    true);
lc.setDigit(0,7,(byte)hoursHigh,   false);
}
(Edit: Apologies – posting the code onto the website alters some of the formatting)
Comments (0)